Exercises · IA-HIP-EXE-006

Hamstring Bridge

Learn the long-lever hamstring bridge for controlled hamstring and posterior-chain loading.

Browse Hip
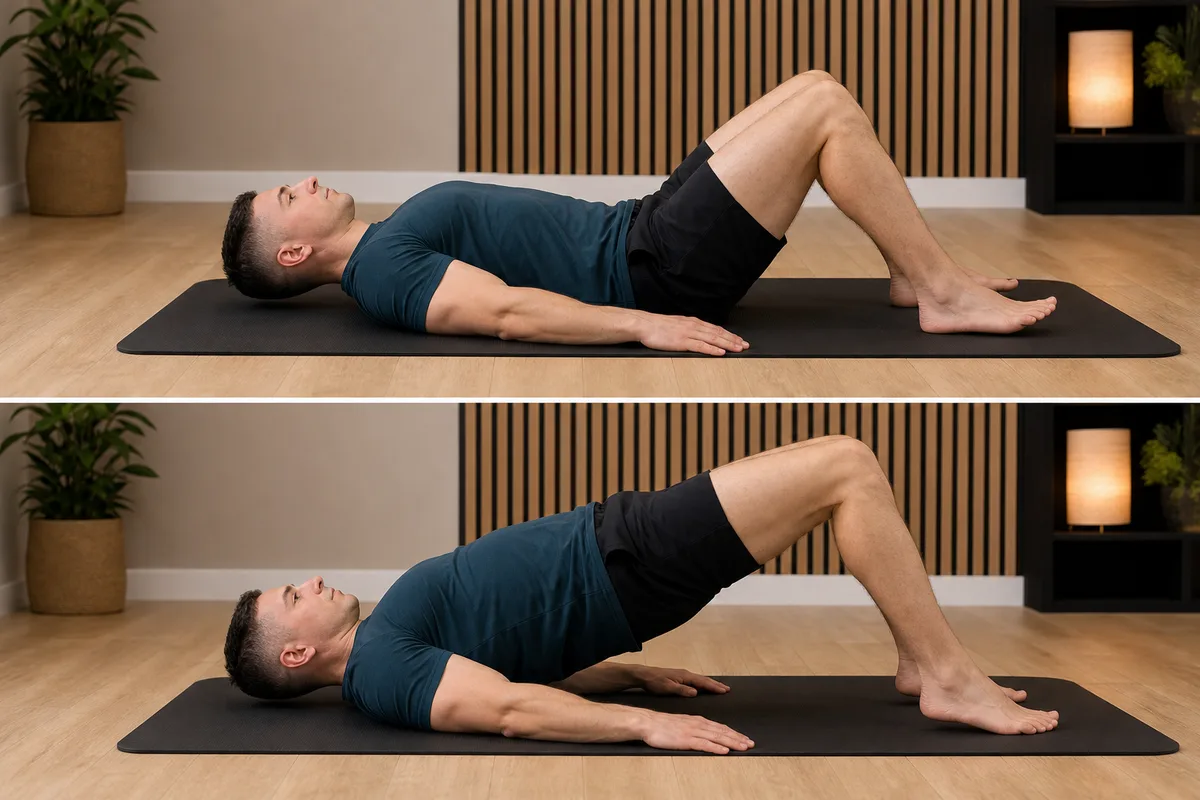
Start and finish demonstration of Hamstring Bridge
Start and finishUse the written steps below for the full technique and safety guidance.

At a glance

Exercise profile

Target muscles
biceps femoris, semitendinosus, semimembranosus
Exercise type
Strength
Equipment
Exercise mat
Mechanics
Compound
Movement pattern
Hip extension (bilateral)
Experience level
intermediate
Secondary muscles
gluteus maximus, adductor magnus

Hamstring and posterior-chain strength

What this exercise works

The long-lever bridge shifts emphasis toward all three hamstring muscles, with the gluteus maximus assisting hip extension.

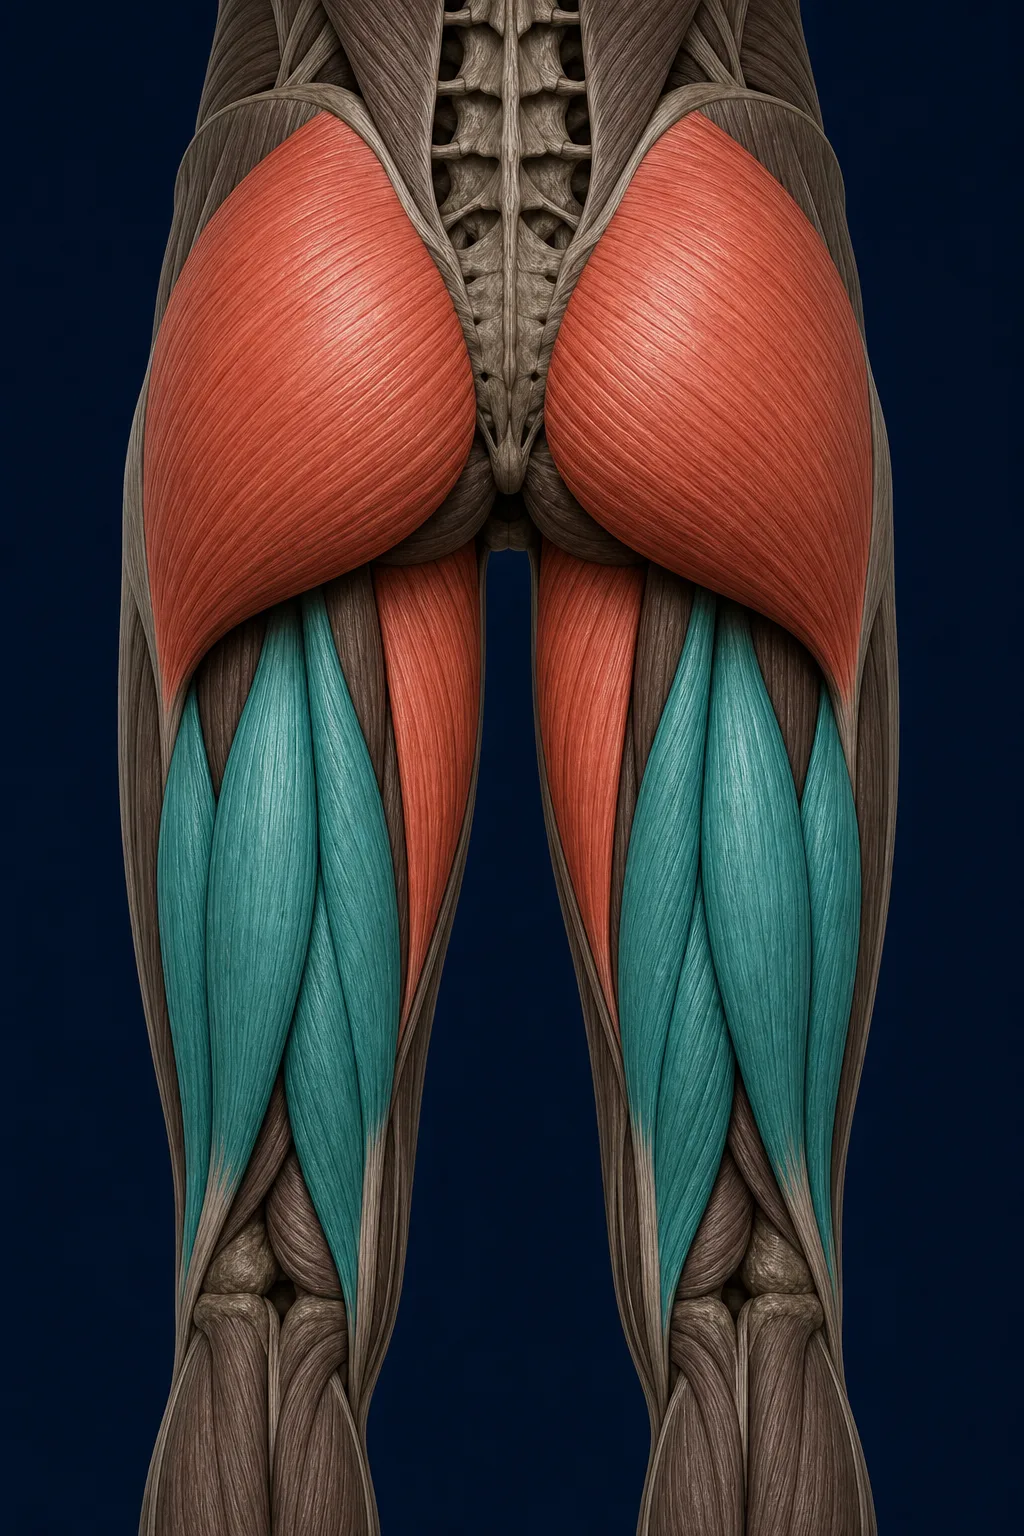
Anatomy highlighting the structures involved in Hamstring Bridge
Teal — primary muscles doing most of the workRed — secondary muscles assistingGrey — stabilizers and surrounding anatomy

Primary emphasis

  • biceps femoris
  • semitendinosus
  • semimembranosus

Secondary muscles

  • gluteus maximus
  • adductor magnus

Stabilizers

  • abdominal muscles
  • lumbar multifidus
  • calf muscles

Movement and joint actions

  • Hip extension
  • Isometric knee flexion
  • Pelvic stabilization

Muscle contribution changes with position, range, resistance and individual technique.

Why it can help

Potential benefits and carryover

Benefits depend on technique, dosage, consistency and whether the exercise suits the person. Sport carryover means supporting the physical demands of the activity—not guaranteeing performance or preventing injury.

Everyday benefits

  • Loads the hamstrings without standing balance
  • Builds strength through hip extension and heel pressure
  • Allows range and lever length to be adjusted
  • Trains a controlled lowering phase

Training carryover

  • Supports hinges, deadlifts and posterior-chain training
  • Provides a bridge between basic floor exercises and standing hamstring work
  • Builds hamstring endurance for repeated hip extension

Sport carryover

  • Supports posterior-chain capacity for running and acceleration
  • Contributes to hip-extension strength used in field sports

Technique

Hamstring Bridge tips

Use these cues to keep the movement controlled and focused on its intended purpose.

  1. Place the heels farther from the hips than in a standard glute bridge.
  2. Press through the heels while keeping the toes light.
  3. Lift only as high as you can without arching the lower back.
  4. Shorten the lever or reduce the range if the hamstrings cramp repeatedly.

Overview

The hamstring bridge uses a longer heel position than a standard glute bridge, increasing the demand on the hamstrings.

How to Do It

  1. Lie on your back with heels hip-width and farther from the hips than in a regular bridge.
  2. Keep knees mildly bent and lift the toes slightly.
  3. Press through the heels and lift the hips.
  4. Pause when shoulders, hips and knees form a straight diagonal.
  5. Lower slowly and begin with 2 sets of 6–10 repetitions.

What You Should Feel

Expect hamstring and glute effort. Stop for cramping that does not settle, sharp buttock pain or a pulling sensation.

Common Mistakes

  • Placing the feet too close to the hips
  • Overarching the lower back
  • Pushing mostly through the toes
  • Progressing to one leg too early

Progression

Add repetitions, then a longer pause or slightly longer lever. Single-leg loading is a later progression.

References

  • American College of Sports Medicine. "Progression Models in Resistance Training for Healthy Adults." 2009. https://doi.org/10.1249/MSS.0b013e3181915670
This is general education. A sudden hamstring pop, bruising or marked weakness needs assessment.
Educational information only

This information does not diagnose an injury or replace care from a qualified healthcare professional.