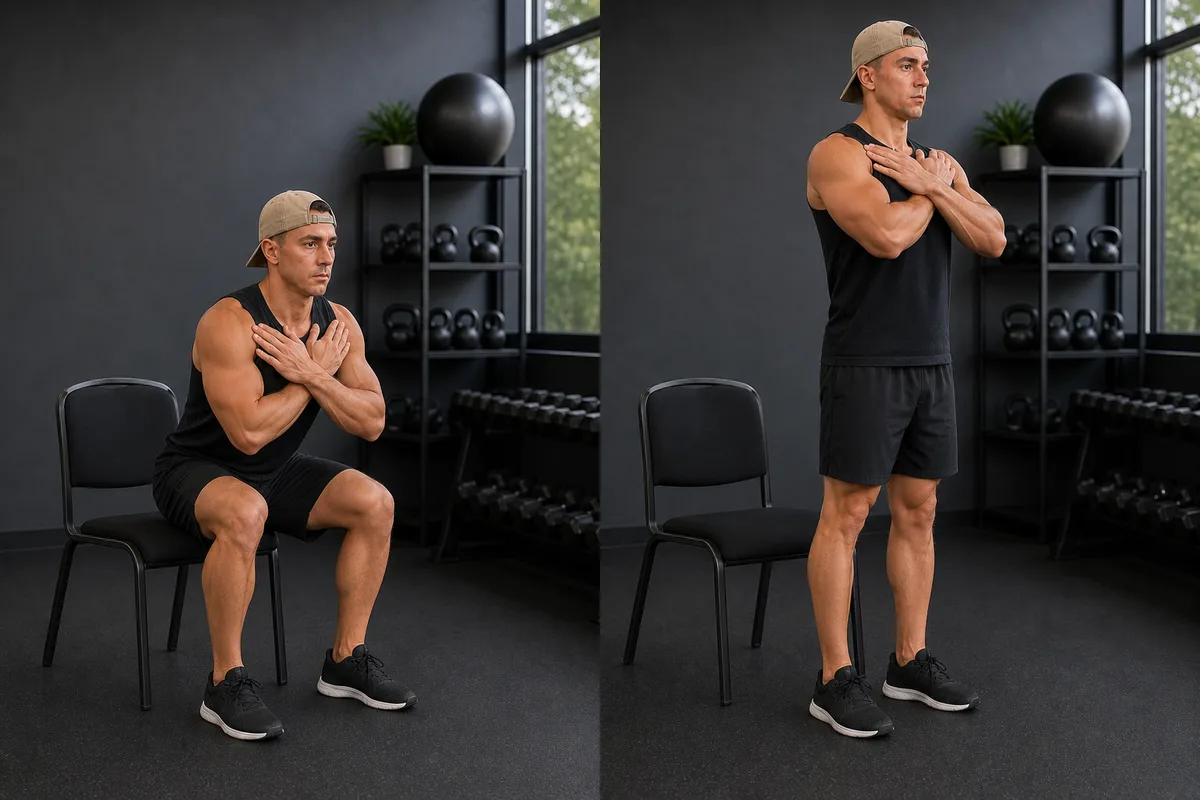
Overview
The sit-to-stand is a simple way to practise the same basic pattern used for getting out of a chair, climbing stairs and squatting. Chair height makes the exercise easy to adjust: a higher seat asks less of the knee, while a lower seat increases the range and demand.
Primary Purpose
- Build quadriceps and hip strength
- Improve control while bending and straightening the knee
- Create a measurable starting point before progressing to deeper or loaded squats
Equipment Required
- A stable chair or bench that will not slide
- Optional sturdy counter, rail or support
Step-by-Step Instructions
- Sit near the front of a stable chair with both feet flat.
- Place your feet about hip-width apart and close enough that you do not need to rock forward aggressively.
- Lean your trunk forward slightly and press through both feet.
- Stand smoothly without letting either knee collapse inward.
- Pause, then reach your hips back and lower to the chair under control.
- Begin with 2 sets of 6–10 repetitions.
What You Should Feel
The thighs and hips should do most of the work. Mild knee discomfort may be tolerable for some people if it remains stable and settles afterward. Stop if pain becomes sharp, the knee catches or it feels likely to give way.
Common Mistakes
- Dropping quickly onto the chair
- Pushing mainly through one leg without intending to
- Letting the knees collapse inward
- Starting from a chair so low that every repetition provokes increasing pain
- Adding weight before the body-weight version is controlled
Easier Alternatives
- Use a higher chair or firm cushion
- Push lightly through a counter or armrests
- Reduce the number of repetitions
Progressions
- Lower the seat slightly
- Slow the lowering phase to three seconds
- Add repetitions, then another set
- Hold a light weight close to the chest
Change one variable at a time and use the knee's response later that day and the next morning to judge the dose.
Who Should Avoid This
Do not use this as self-directed rehabilitation after a major recent injury, surgery or suspected fracture unless you have been cleared to load the leg. A locked knee, rapid swelling, inability to bear weight or repeated giving way needs assessment.
Related Guidance
- General knee loading principles
- Why does my knee hurt when I squat?
- Patellofemoral pain
- Knee osteoarthritis
- Patella anatomy
References
- Neal BS, et al. "Best practice guide for patellofemoral pain." British Journal of Sports Medicine. 2024. https://bjsm.bmj.com/content/58/24/1486
- Willy RW, et al. "Patellofemoral Pain: Clinical Practice Guidelines." Journal of Orthopaedic & Sports Physical Therapy. 2019. https://doi.org/10.2519/jospt.2019.0302
This information is for education only and is not a medical diagnosis. InjuryAtlas does not replace an assessment by a qualified health professional. If you have severe pain, visible deformity, numbness, loss of function, or symptoms that are getting worse, seek medical care promptly.